Teams Integration
Written By Robert Thomas
Last updated 2 months ago
The following guide explains how to configure Teams Integration in MEDIAL.
Note: Administrative access to the Azure portal is required in order to set up a new App Registration.
Azure Configuration
Log into the Azure portal.
In the search bar search for App Registrations.

Click on New Registration.

Provide a user facing name and leave it set to Single Tenant.
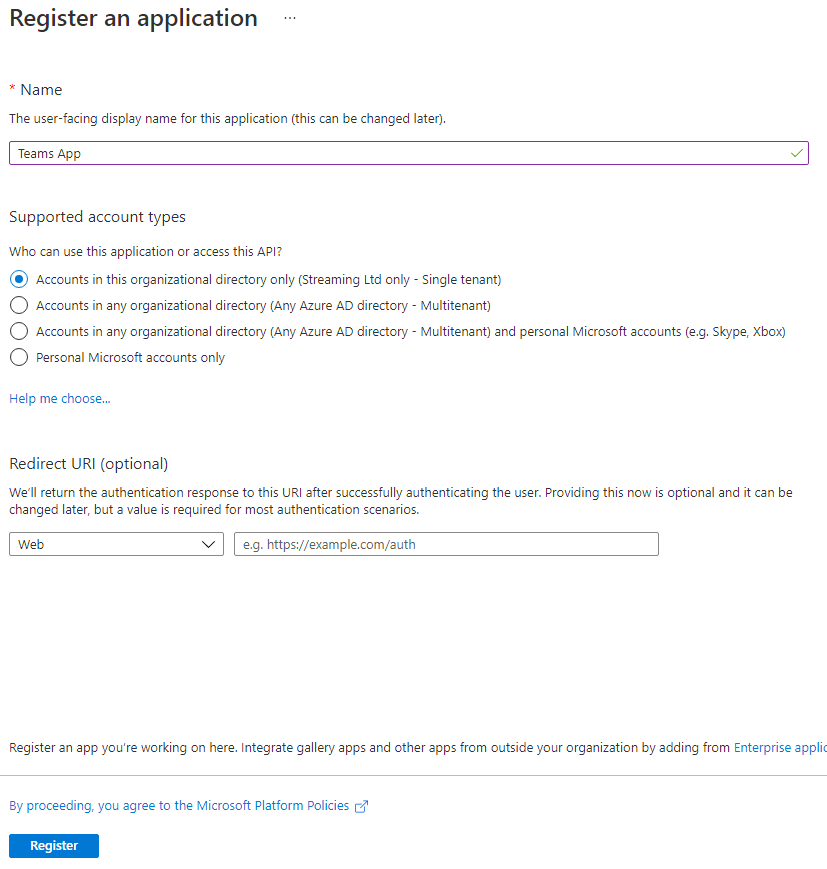
Leave the Redirect URI blank. Click Register.
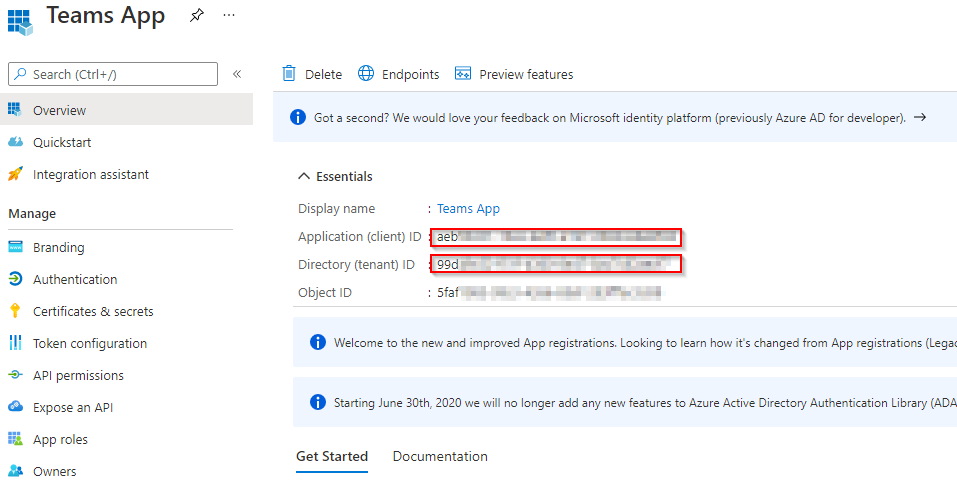
Once the app is registered it will open and take you to the Overview screen. Make a note of the Application and Directory (tenant) ID’s.
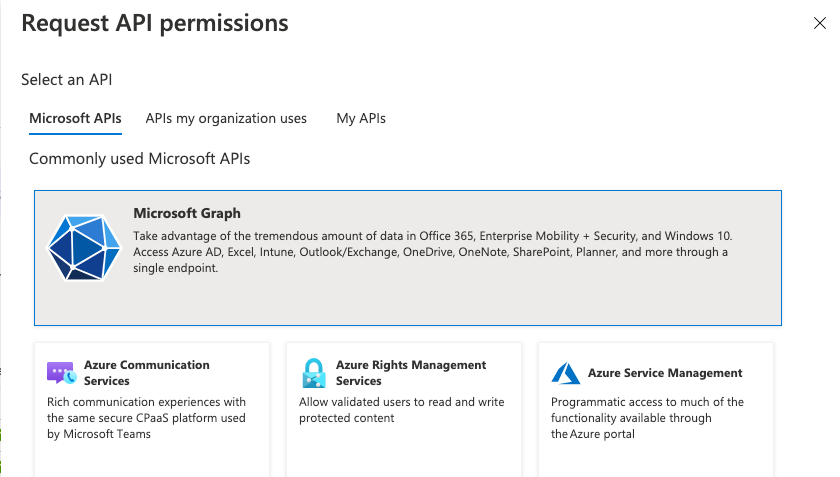
Click on API permissions.
The following permissions need to be added for Microsoft Graph API:
Directory.Read.All (Application)
Sites.Read.All (Application)
User.Read (Delegated)
User.Read.All (Application)
Select Add a permission.
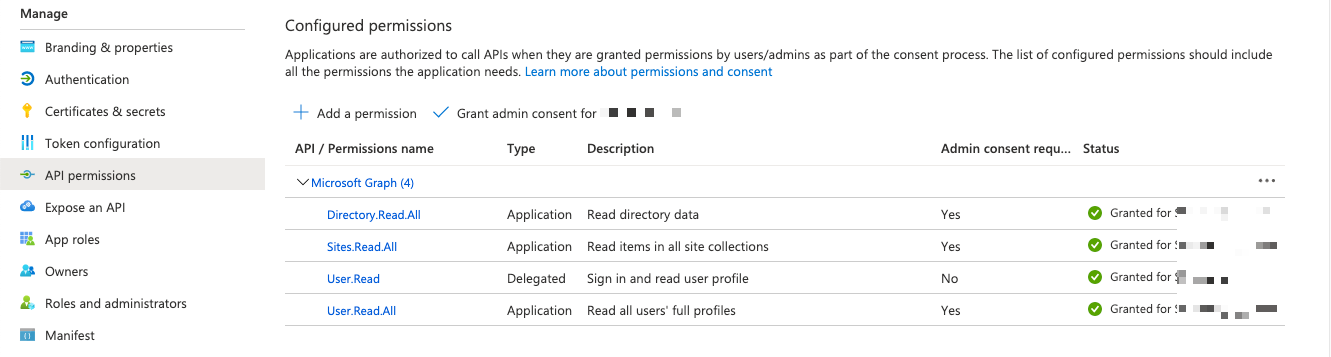
Click on Microsoft Graph, then add the permission. Repeat for all of the permissions listed above.
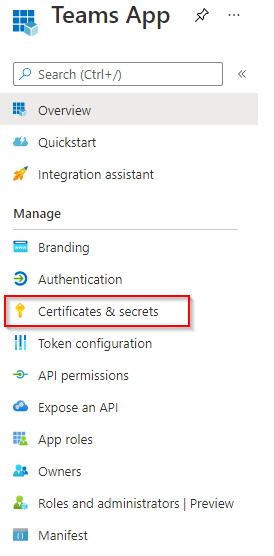
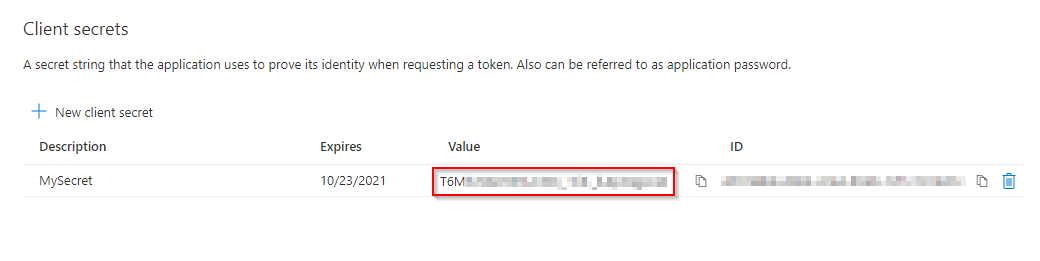
Click on Certificates and secrets.
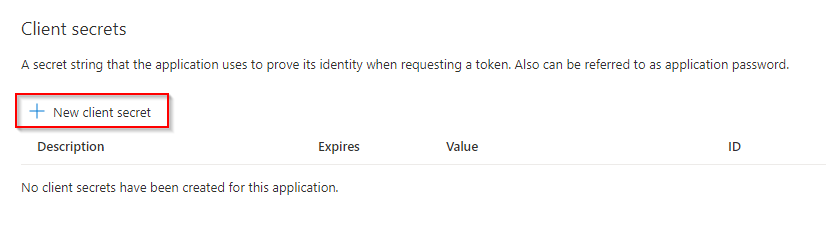
Click on New Client Secret.
Enter a description and enter a from and to date. Ensure the longest date is set for expiry.
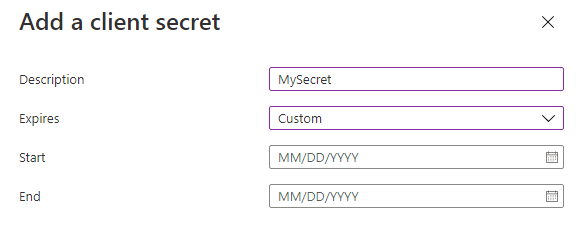
Make a note of the value of the secret.
MEDIAL Configuration
Note: Before proceeding, the following information can be helpful when determining where to configure MEDIAL to look for recordings:
Teams recordings can be stored in two different Microsoft 365 locations, depending on how the meeting was created.
For non-channel meetings — for example, meetings created directly from a tutor’s Teams or Outlook calendar — Microsoft stores the recording in the meeting organiser’s OneDrive, normally under /Recordings. For channel meetings, the recording is stored in the SharePoint site behind that Team/channel, usually in the channel’s Recordings folder. ()
That distinction is important for MEDIAL. The OneDrive scan is the best way to pick up recordings created directly from staff calendars, including meetings where students are added manually or via Entra ID groups. The SharePoint/channel URL scan is for recordings created inside Teams channels, where the file belongs to the Team’s SharePoint site rather than an individual organiser’s OneDrive.
The wildcard channel URL option is useful where Teams sites follow a known pattern, for example https://domain.sharepoint.com/sites/institution/*, but it will not by itself discover every possible Team/channel if those sites are created in an unmanaged way. In those cases, customers normally rely more heavily on the OneDrive scan across the relevant staff population, then add known SharePoint/Teams channel locations where channel-based teaching is used
Log into MEDIAL as an administrator and navigate to the admin/upload site. Click on the Teams icon.
In the Settings area enter in the Tenant ID, Application ID and Application secret noted down previously.
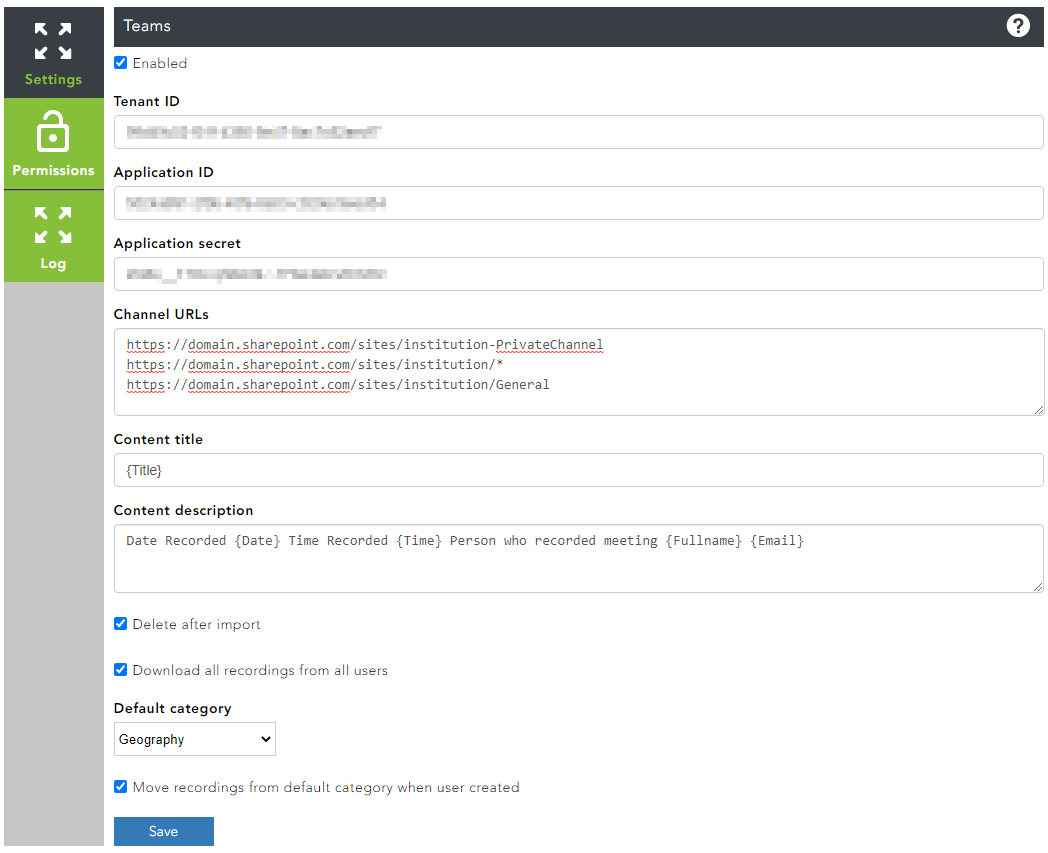
Ensure that the box at the top of the screen is checked to enable Teams Integration
Enter the channel URL's that you would like to enable recording ingest for. These can be full URL's for the channels that are set up in Teams, or can have a wildcard appended so that any channel is set for ingestion after a certain point, i.e. https://domain.sharepoint.com/sites/institution/*
If a channel has been set up on an ad-hoc basis then the channel URL might not be found using a wildcard. In this scenario it can be added into the Channel URL's area by finding the team ID and channel ID. To do this, find the channel in Teams and right-click it. Click on Get link to channel.
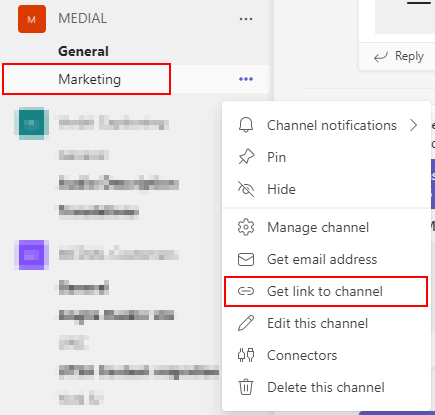
From the box that appears the team ID (called groupid in the channel ID string) and the channel ID (this has '%' signs in it and is shown after /channel/ in the string) need to be copied. Copy each of these values to a Notepad file.
The team ID will look like this: c13d4f00-fbd1-xxx-b5a6-835xxxxc96d3
The channel ID will look like this: 19%3a9xxxf89359f3xxxxb7cfdee37315ae27%40thread.tacv2
The above channel ID needs to be unencoded. To do this the '%3a' and '%40' sections need to be replaced.
Replace %3a with a colon - :
Replace %40 with an @ symbol - @
Once this has been done, the above team and channel ID's can be entered into the Channel URL's box in MEDIAL as follows:
c13d4f00-fbd1-xxx-b5a6-835xxxxc96d3 -> 19:9xxxf89359f3xxxxb7cfdee37315ae27@thread.tacv2
These channel ID's as show above can be added along with other ones of this type and full URL's with or without wildcards.
The Content title and Content description fields can be left as the default for those values to be brought in from Teams, or any of them can be deleted if they are not required
Check the box to remove the recordings from Teams once they are ingested into MEDIAL if you would like them to be deleted from SharePoint cloud storage once they have been ingested
If you would like recordings from all Teams users to be ingested into MEDIAL check the ‘Download all recordings from all users’ box. All recordings will be ingested under the hmladmin account if no user exists with matching email address in MEDIAL
Select the default category where channel recordings should appear in MEDIAL
Check the box to move recordings from the default category when a user is created to move the recordings into a users' personal category in MEDIAL when a user account is present for them
Click on Save to save all of the changes.
Note: Once enabled it may take up to 1-2 hours for content from Teams to begin to populate into MEDIAL. If after 2 hours no content is seen on the Content Listing page please contact Support.
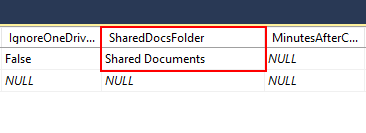
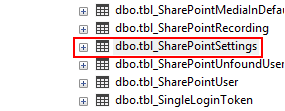
Important: For customers outside of the UK the 'shared documents' area in SharePoint might be called something different. For example, sometimes it is called 'Documentos Compartidos' in Spanish setups. If this is the case it can be changed in the VLS database. To do this connect to the server hosting the database and log in to SQL Management Studio. Expand the VLDS database, and then Tables, and right-click the 'tbl_SharePointSettings' table. Click 'Edit top 200 rows'.
Locate the 'SharedDocsFolder' column and change the value in the field to the name of the shared documents folder in the local language as it is written in the SharePoint environment. Hit return or click out of the field to commit the change.