SSO Configuration
Written By Robert Thomas
Last updated 6 months ago
MEDIAL can be configured for SSO integration with Azure AD using SAML2. This topic describes the process of setting up and configuring the Azure Enterprise App, testing the connection and enabling SSO in MEDIAL.
Create the Enterprise Application in Azure
In the Azure portal search for Enterprise Applications and click on the icon for it.
Click on New Application.

Click on Create your own application.

Select Integrate (non-gallery) and call it MEDIAL.
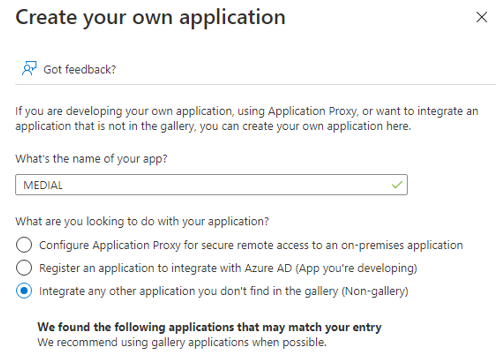
Click Create.
Click Get Started in Set up single sign on.
Click SAML.
Click on 'Edit' in the 'Basic SAML Configuration' box.
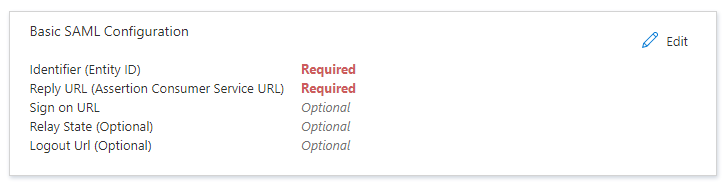
Enter in the following values and click Save:
Identifier (Entity ID) - Start by using: https://ssotester.medialibrary.com/
Reply URL: https://ssotester.medialibrary.com/saml2/assertresponse
Logout URL: https://ssotester.medialibrary.com/saml2/logoutresponse
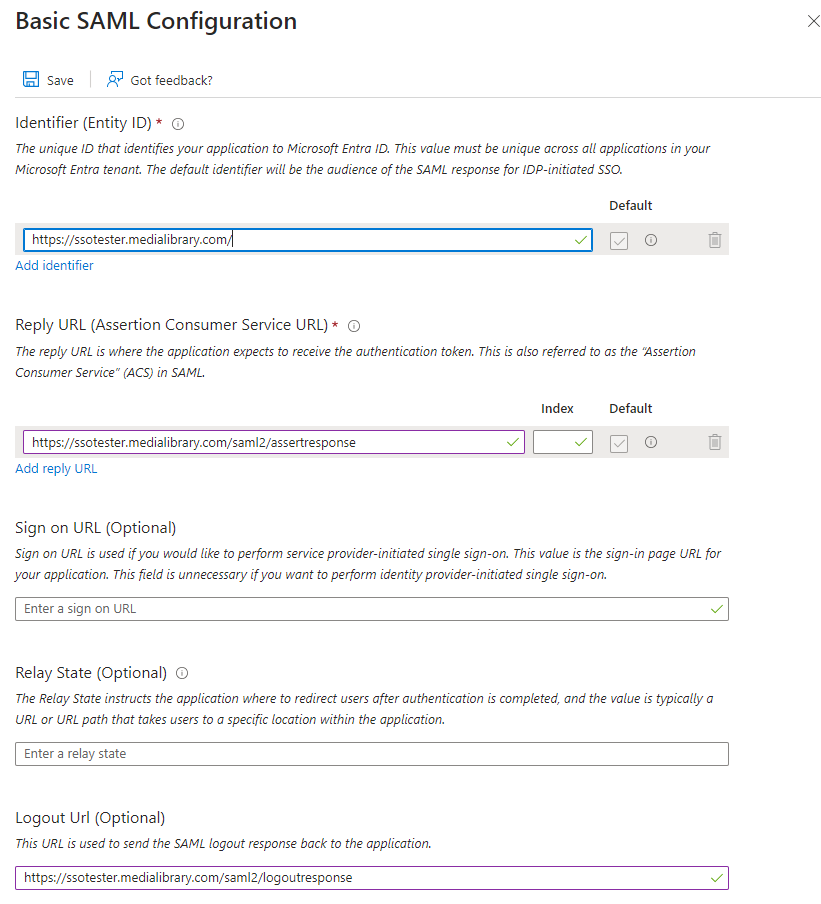
Note: Later on the Identifier, Reply URL and Logout URL will be changed point to the MEDIAL hostnames.
Click Save.
Click 'Edit' in the 'Attributes & Claim's box.
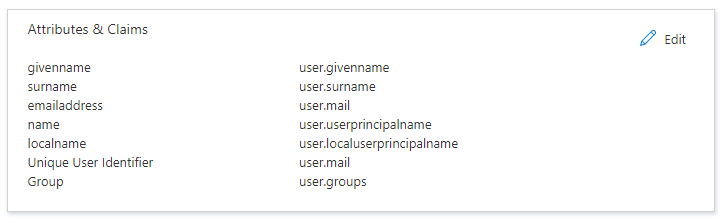
Click Add a group claim.

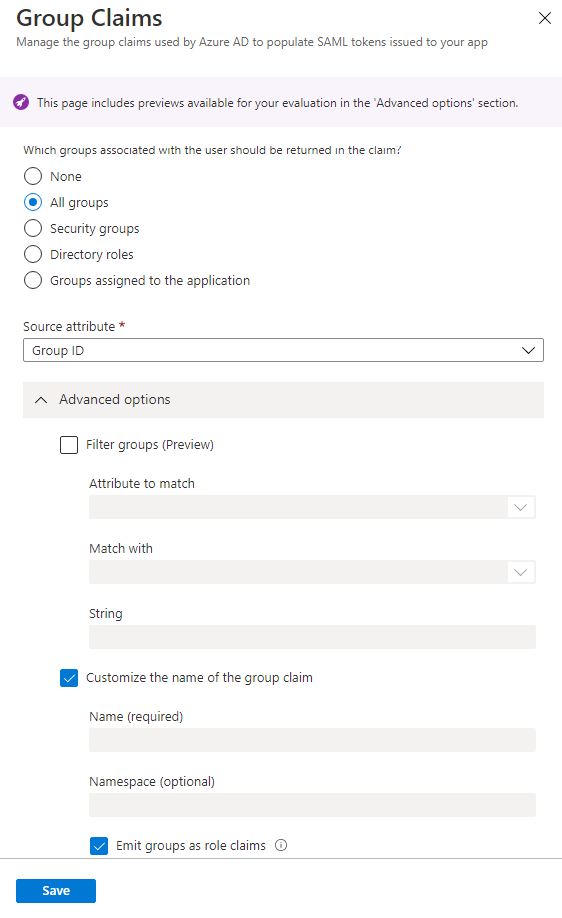
Select All groups, expand the Advanced options area, and then check the 'Customize the name of the group claim' check box. Check the 'Emit groups as role claims' box and click OK.
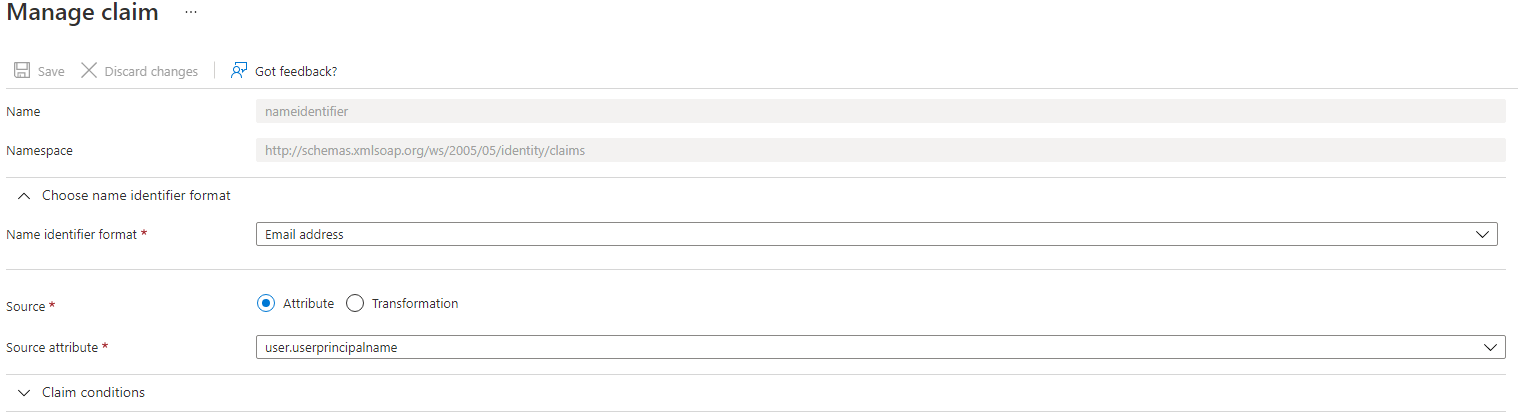
Click on the Unique User Identifier (Name ID) claim to manage it.

Select the Name identifier format that is desired when logging into MEDIAL.
Exit the blade so you are back on the Set up Single Sign-On with SAML page.
Test Authentication
Navigate to https://ssotester.medialibrary.com/ in a browser. Enter the Login URL into the Identity Provider URL field, and the Azure AD Identifier into the Identity Provider Entity ID field. Add the Name Id Format as the following (this example shows the format as email address): urn:oasis:names:tc:SAML:1.1:nameid-format:emailAddress
Test the login works by clicking the Contact identity provider button.
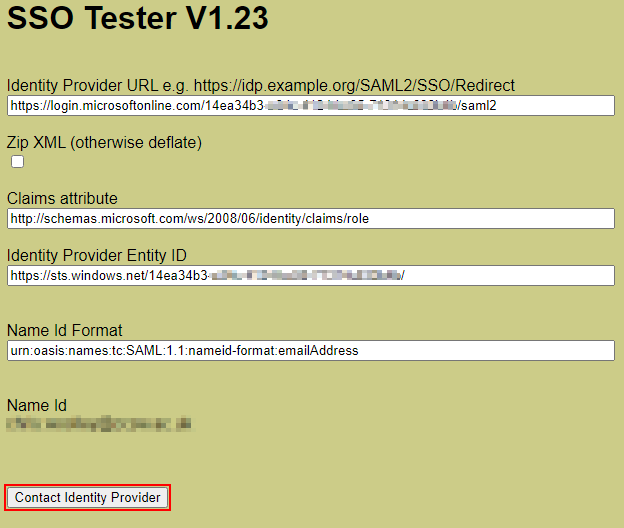
When it connects successfully it will show the Name Id or email address of the account below the Contact Identity Provider button.
Edit the Enterprise Application in Azure
Once the SSO tester site has been used to confirm that authentication works and the settings have been implemented in the MEDIAL VLS database, the enterprise application in Azure needs to be edited to reflect the MEDIALhostnames.
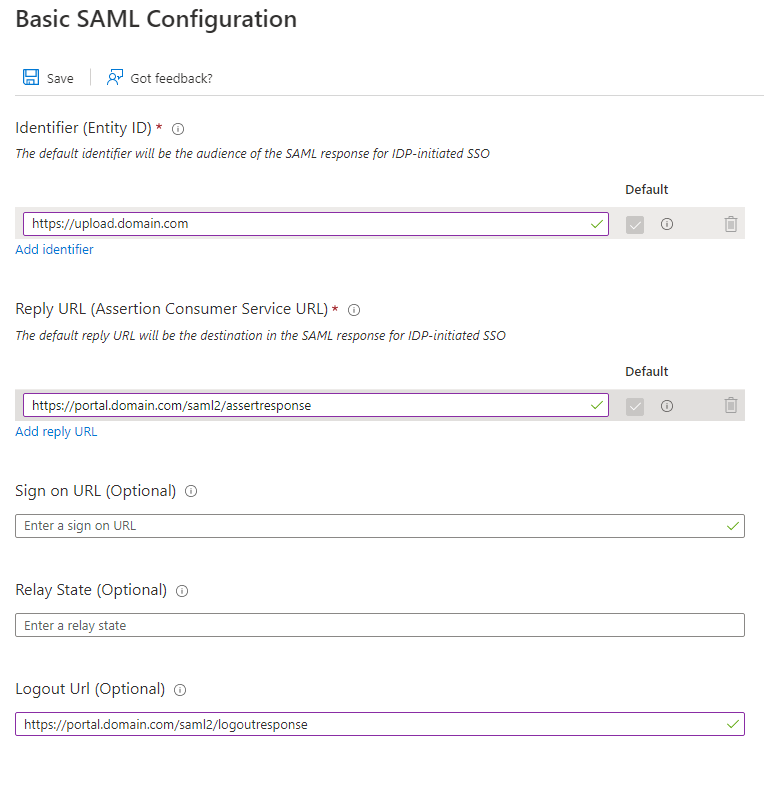
In the MEDIAL Enterprise App in Azure, change the SSO tester Identifier URL in the Basic SAML Configuration area to be the back end URL of MEDIAL, i.e. https://upload.domain.com
Change the Reply URL to be the back end URL of MEDIAL, i.e. https://upload.domain.com/saml2/asstertresponse
Change the Logout URL to the back end URL of MEDIAL, i.e. https://upload.domain.com/saml2/logoutresponse
Download and Install the Base64 Certificate on the MEDIAL Server
In the SAML Signing Certificate box, click on the Download link for the Base64 certificate.
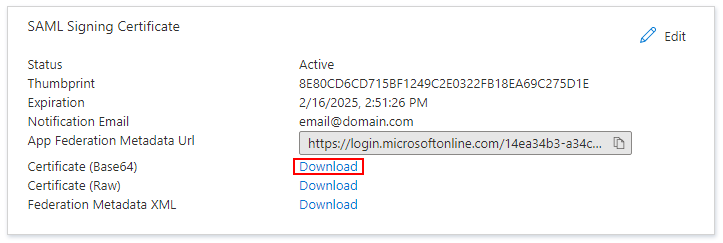
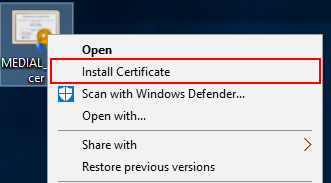
Copy the certificate to the MEDIAL server and right-click it. Click on Install Certificate.
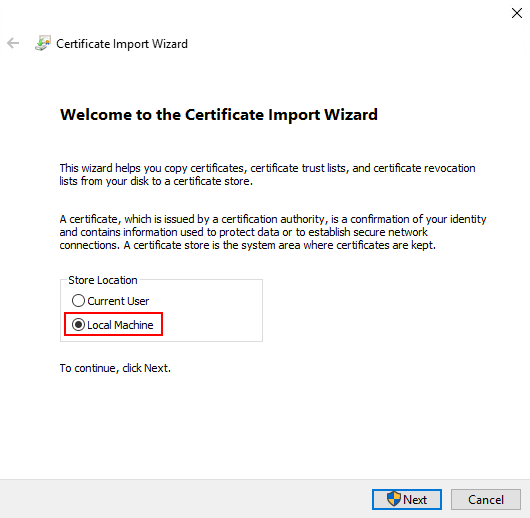
Select Local Machine and click Next.
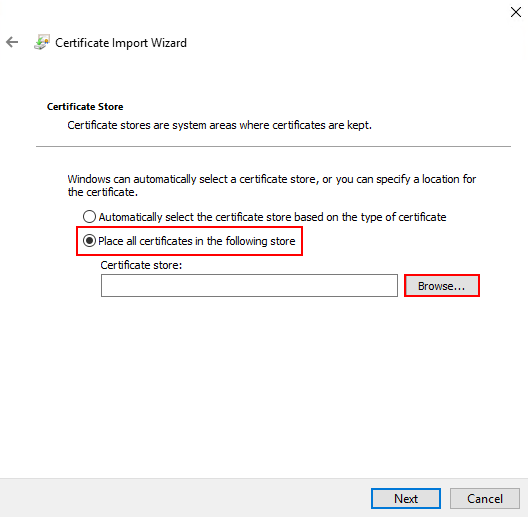
Click Browse to browse the list of certificate stores.
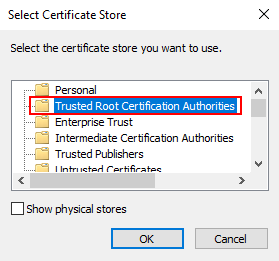
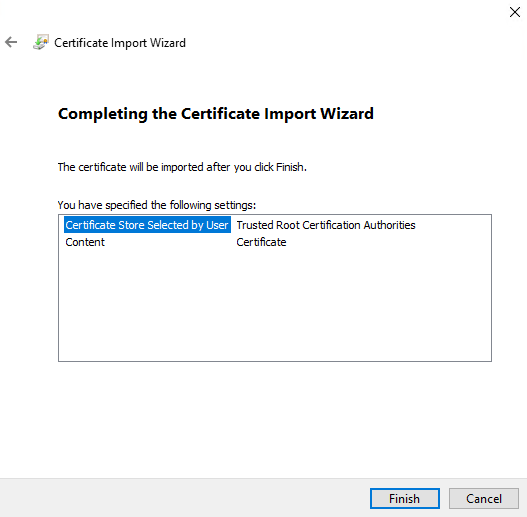
Select Trusted Root Certification Authorities and click OK.
Click Next and then click Finish.
Implement the Settings in MEDIAL
In the Set up Single Sign-On with SAML area of your Enterprise App in Azure, find the following section that contains the Login URL, Microsoft Entra Identifier and Logout URL:
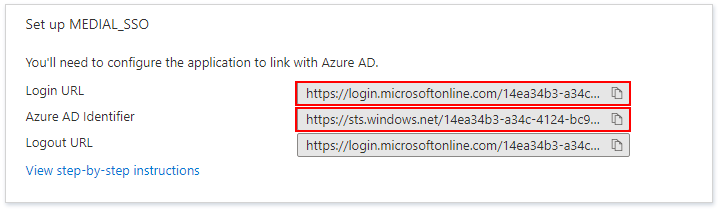
Log into SQL Management Studio and open the VLS database. Locate the table called tbl_SsoSettings. Enter the login URL in the LoginUrl column, and the same URL into the LogoutUrl column. Paste the Azure Identifier URL into the EntityProviderUrl column.

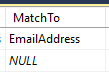
In the MatchTo column, set the value according to the Name Identifier format set earlier in Azure. If for example it’s set to email address, set the value to 'EmailAddress'.
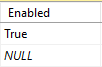
In the VLS database, set the ‘Enabled’ value to 'True' in the tbl_SsoSettings table.
Create Groups in MEDIAL and Test Authentication
Go to the MEDIAL portal in a web browser. In the back end go to the Security menu, and create the new groups as necessary. For existing groups add in the Azure group identifiers (found in the .csv file downloaded from Entra) for those groups. The friendly name will be displayed in MEDIAL, and the group identity should match the identity of the group in Azure.
Note: These can be added in bulk into MEDIAL during the migration to SSO if there are many groups on the system. Please contact Support for assistance with this.
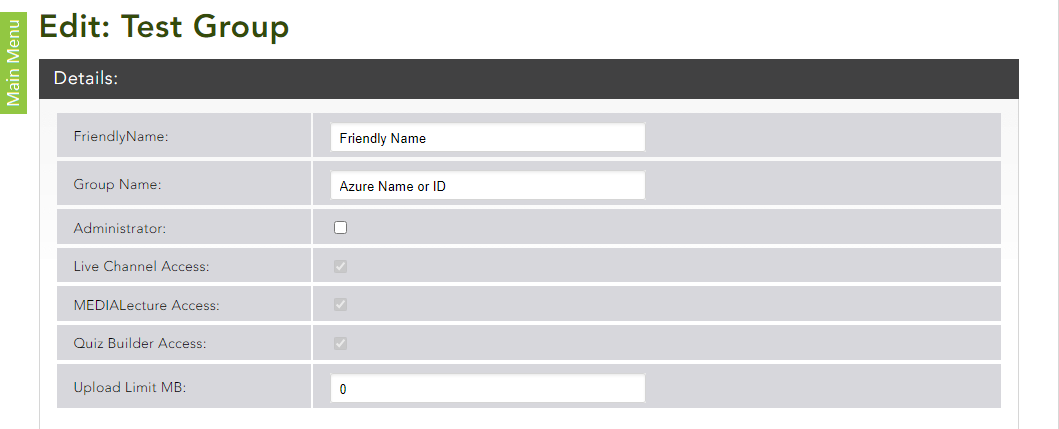
Note: To log in as the local 'hmladmin' account, enter your front end MEDIAL URL in a browser followed by '/local'. I.e. https://portal.domain.com/local
Test logging in with a user account of one of the groups.
Upload the MEDIAL icon for the Enterprise Application
In Azure, go to the MEDIAL SSO Enterprise Application and click on Properties. In the Logo section, click on Select a file and upload the MEDIAL logo. There are two MEDIAL icons to chose from, which can be downloaded using the following links:
https://medial-static.s3.eu-west-2.amazonaws.com/medialappsso_215.png
https://medial-static.s3.eu-west-2.amazonaws.com/medialappsso2_215.png
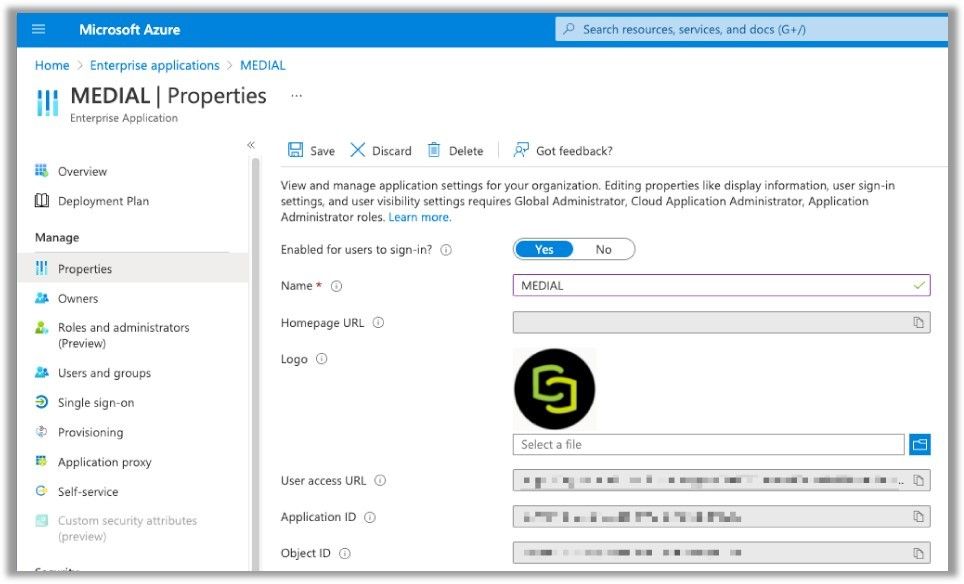
Click on Save to save the changes.
Was this helpful?
Still need help? Ask the team